The process of installing Lightroom presets is pretty simple, and this page includes step-by-step instructions that walk you through it.
These instructions assume that you have already downloaded the presets and unzipped the file.
Step 1: Copy Presets that You Want to Install
At this time you want to copy the presets files to your clipboard. If you have purchased and downloaded our presets they will be contained in a folder. You will either be copying/installing one folder or multiple folders, if you purchased multiple sets of presets. For this example we are showing the process of installing all of our Lightroom presets, which would be the case if you purchased our Lightroom Presets Bundle.
Once you’ve unzipped the file, you will see the list of folders of presets. For this example we will select all of the folders, right click, and copy. If you only purchased a single pack of presets you will be selecting and copying a single folder. Don’t copy any PDFs.
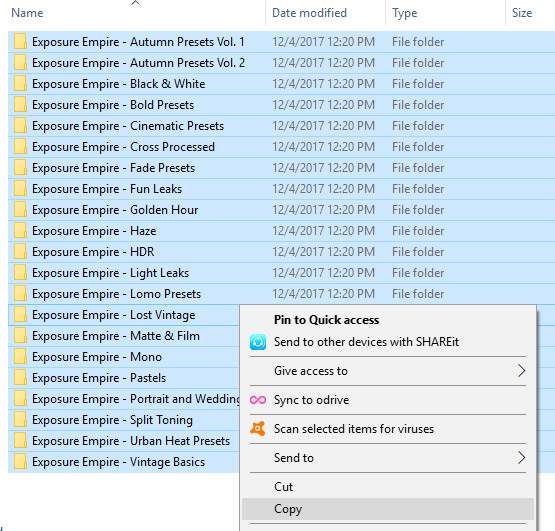
Copy the folders that you want to install
Step 2: Go to the Presets Preferences
From inside Lightroom, if you are on a PC you will go to Edit > Preferences. If you are on a Mac you will go to Lightroom > Preferences. This will open the preferences window shown below. Click on the “presets” tab, indicated by the green arrow in the screenshot below.
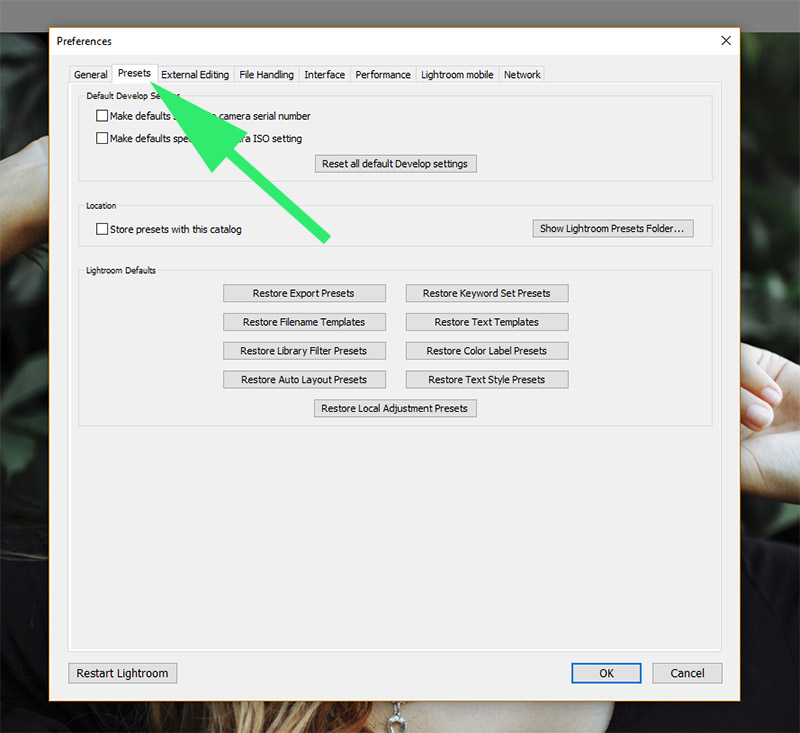
Once you are on the presets tab, make sure the box for “store presets with this catalog” is unchecked (as shown be the green arrow in the screenshot below).

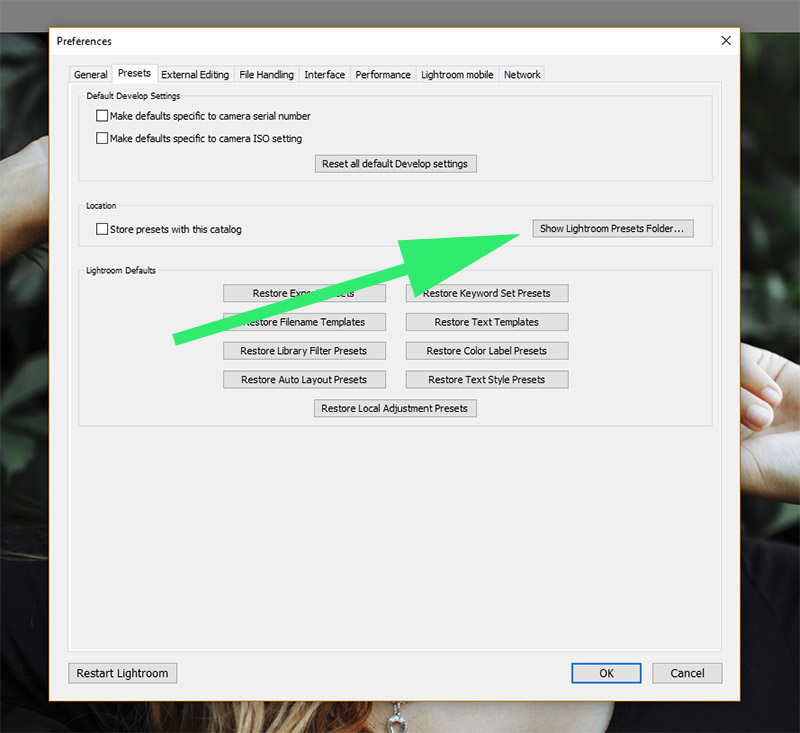
Next, click on the button that says “Show Lightroom Presets Folder” , as shown by the green arrow below.
Step 3: Paste the Presets
After you click on the “Show Lightroom Presets Folder” it will open a window that looks like the screenshot below.
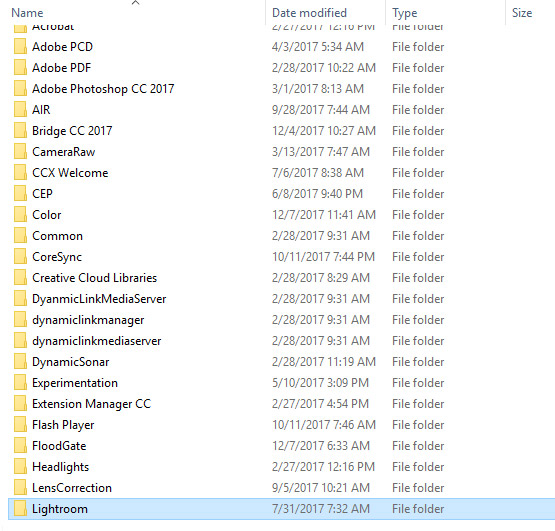
Open the Lightroom folder
Double click on the “Lightroom” folder to open it. Next, you’ll see a list of folders like the screenshot below. Double click on the “Develop Presets” file to open it.
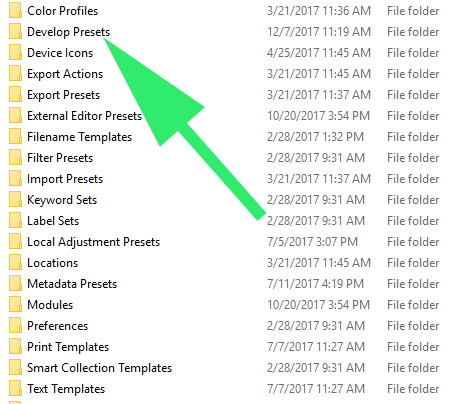
Open the Develop Presets folder
Inside the “Develop Presets” folder you should see a folder called “User Presets”, and if you have any other presets installed you will see them here.

You will see the User Presets folder and any other presets that you have installed
Paste the preset folders here, next to the “User Presets” folder. After you have pasted the new preset folders you should see them listed. The screenshot below shows all of the preset folders I just pasted, plus the “User Presets” folder.
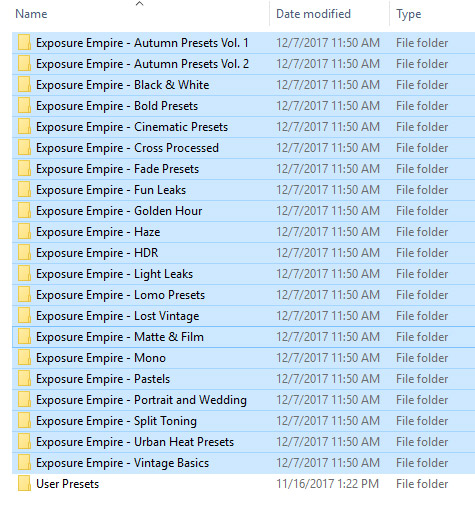
Paste the folders that you want to install
Step 4: Close and Re-Start Lightroom
The last step to complete the installation is to completely close out of Lightroom. Once you re-open Lightroom the presets will be installed and ready for use.
Using the Presets
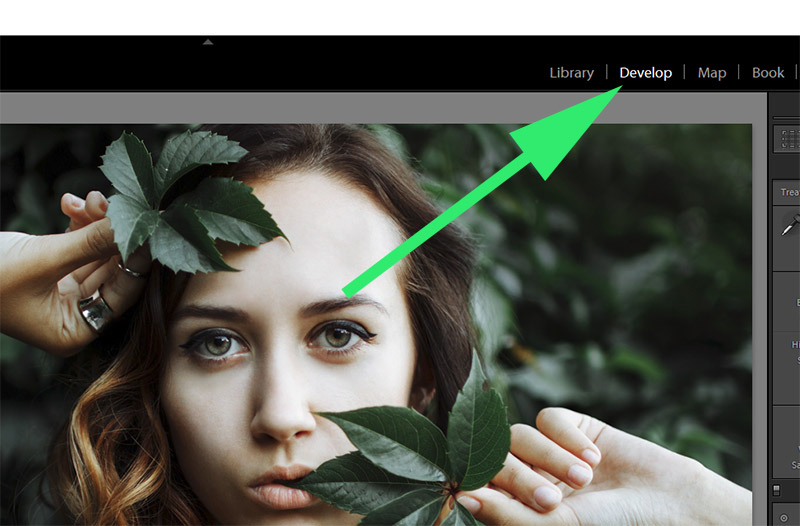
To use the presets you will need to be in the Develop module, so click on “Develop” in the top right of the screen.
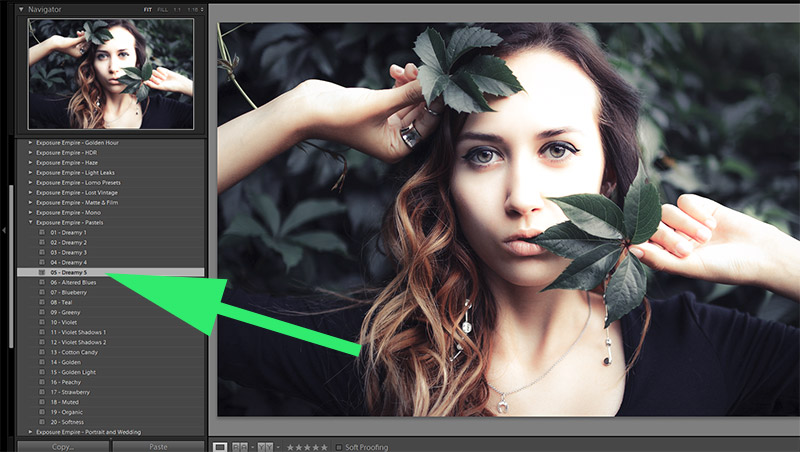
The presets will be listed in the left sidebar. Click on the arrow to open the list of presets or to open the folder of each pack of presets.
![]()
Then, to use a preset just click on the same of the preset and it will be applied to the photo.
If you have questions or need assistance please contact us.